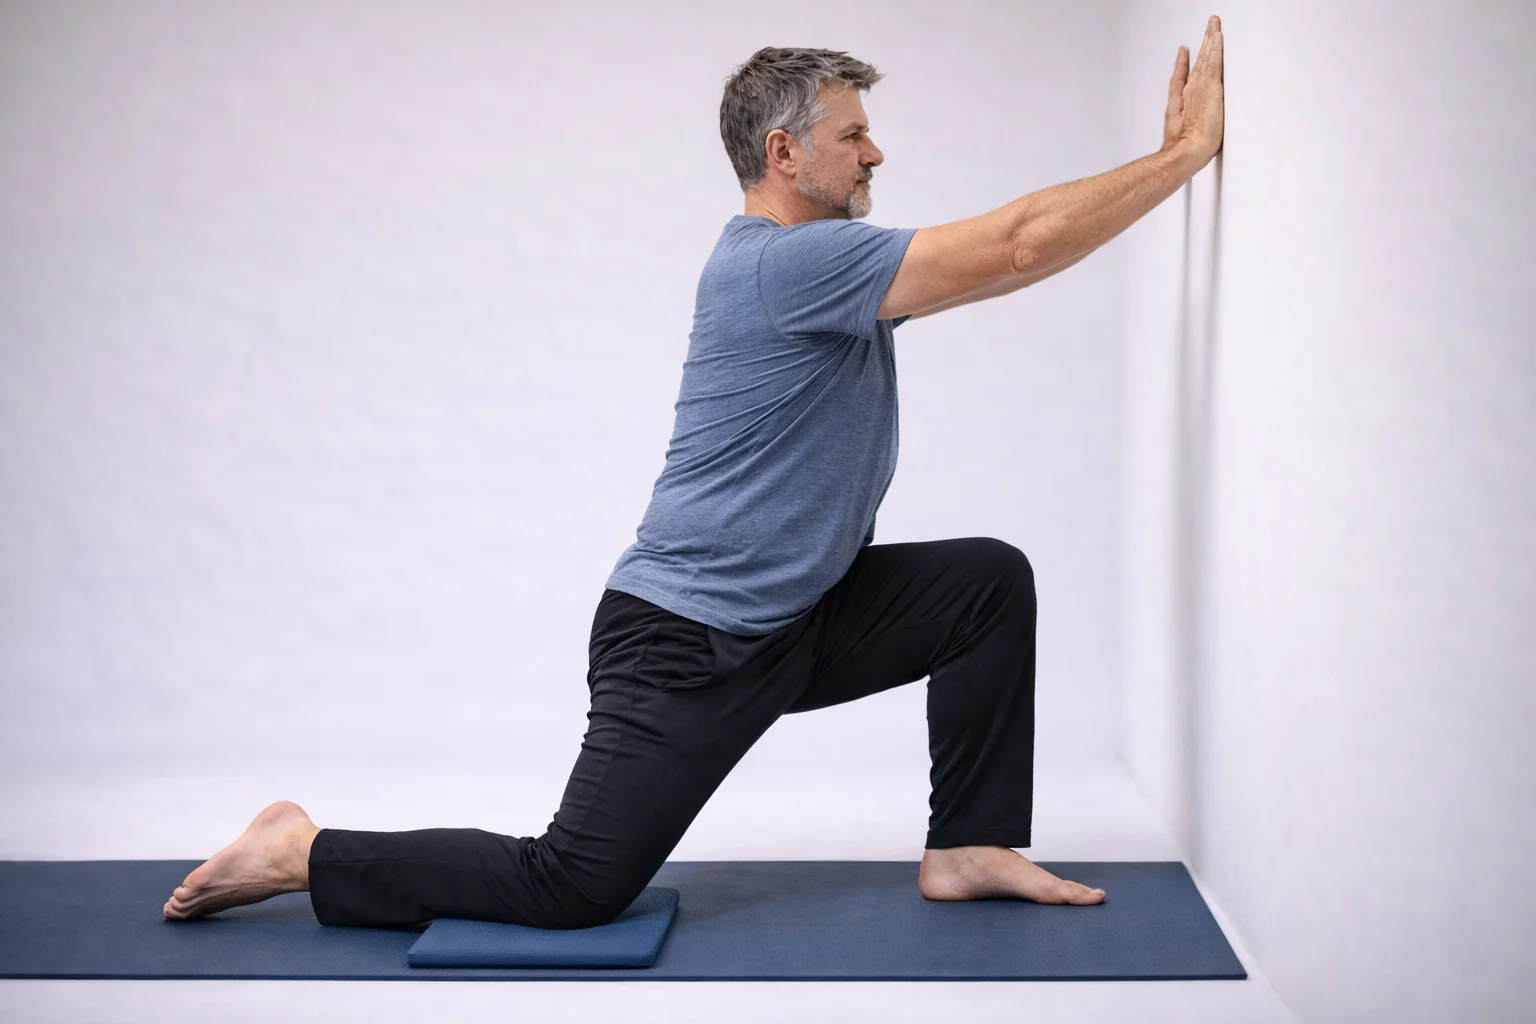
Standing Hip Flexor Stretch at Wall
Purpose: Lengthen chronically shortened hip flexors from sitting and forward work
Duration: 90 seconds each side (3 minutes total)
The Biomechanics
The hip flexors (psoas, iliacus, rectus femoris, TFL) are the muscles that pull your knee toward your chest. When you sit, they're in a shortened position. Hours of sitting daily, year after year, causes them to adaptively shorten.
The cascade of problems:
- Tight hip flexors pull the pelvis into anterior tilt (top of pelvis tips forward)
- Anterior tilt compresses the lumbar spine
- Compressed lumbar spine = lower back pain
- Tight hip flexors also inhibit the glutes (reciprocal inhibition)
- Inhibited glutes = more lower back compensation
This stretch directly addresses the root cause of most lower back pain in desk workers and contractors alike.
Why This Matters for Contractors
Even physical workers sit more than they realize:
- Driving between jobs
- Lunch breaks
- Paperwork and planning
- Evening recovery
Add forward-bending work (which also shortens hip flexors), and you have a recipe for chronically tight anterior hips pulling your pelvis out of alignment.
How to Do It
Setup
- Stand facing away from wall, about one stride-length away
- Place folded towel or mat on floor against wall for knee padding
- Step right foot forward into lunge position
- Right knee bent, right foot flat on floor, knee roughly over ankle
- Lower down so left knee contacts padded surface
- Place left shin vertical against wall (left foot pressed against wall, sole facing up)
- Hands on right thigh for support and balance
- Torso upright—resist temptation to lean forward
The Critical Action: Posterior Pelvic Tilt
This Is What Makes It Work
Without the pelvic tilt, you're stretching your lower back, not your hip flexor. This is the most common mistake.
- Tuck your tailbone under by engaging core and squeezing glutes
- Think: "Tilt top of pelvis backward" or "Bring belt buckle toward chin"
- You should immediately feel intense stretch in front of left hip
- May also feel stretch down front of left thigh (rectus femoris)
Common mistake: Arching lower back feels like stretching, but defeats the purpose. The stretch should be in FRONT OF HIP, not lower back.
Hold and Breathe
- Hold 90 seconds
- Breathe normally
- With each exhale, try to tuck pelvis slightly more
- Switch sides
Form Critical Points
- Posterior pelvic tilt is mandatory: No tilt = wrong stretch
- Torso stays upright: Don't lean forward
- Front knee over ankle: Not way past toes
- Back shin vertical: Pressed against wall
- Squeeze the glute: On the side being stretched—this deepens the stretch
Jeff Cavaliere's Critical Insight
"If you're not achieving posterior pelvic tilt, you're stretching your lower back, not your hip flexor. Feel it in the front of your hip or you're doing it wrong."
What It Should Feel Like
Normal sensations:
- Deep stretch in front of hip (where leg meets pelvis)
- Possible stretch down front of thigh
- Intensity 5-7/10 with proper pelvic tuck
- Sense of hip "opening"
Should NOT feel:
- Lower back compression or arching
- Knee pain (front or back)
- Groin strain
- Numbness
Variations
Without Wall (Easier Balance)
- Standard kneeling lunge without back foot on wall
- Less intense, easier to balance
- Good starting point if wall version too challenging
Elevated Back Foot (Couch Stretch)
- Back foot on couch or chair instead of wall
- Same mechanics, more comfortable for some
- Easier to adjust height
Advanced: Overhead Reach
If you can maintain position with good pelvic tuck:
- Raise arm (same side as back leg) overhead
- Lean slightly away from back leg
- Intensifies stretch along entire side
- Only do this if you can maintain pelvic tuck
Troubleshooting
Can't balance in position
- Solution 1: Place chair beside you, hold with one hand
- Solution 2: Do in doorway, brace against both sides
- Solution 3: Use wall corner (can touch two walls)
- Timeline: Balance improves in 1-2 weeks as hip releases
Don't feel stretch in hip, feel it in lower back
- Cause: Not achieving posterior pelvic tilt—you're arching
- Solution: Tuck harder—squeeze glutes like holding coin between cheeks
- Cue: Place hand on lower back—should feel flat, not arched
- Video yourself: Often helps to see what pelvis is actually doing
- Alternative: Bring front foot farther back (reduce lunge depth)
Feel it TOO intensely (overwhelming)
- Cause: Hip flexors severely tight, or going too deep
- Solution: Bring front foot farther back (reduce lunge depth)
- Alternative: Don't use wall—just kneel with back knee down
- Timeline: Start with 30 seconds, build to 90 over 2 weeks
Back knee hurts against wall
- Solution 1: More padding (thicker mat, pillow, cushion)
- Solution 2: Keep shin at 45° angle instead of vertical
- Solution 3: Wear knee pads
Front knee pain
- Cause: Front knee too far forward (past toes)
- Solution: Move front foot forward so knee stays over ankle
- Check: Should be able to see toes when looking down
Bram's Experience
Week 1: Couldn't believe how tight his hip flexors were. Needed chair support, could only hold 30 seconds before the intensity was overwhelming. Could barely achieve pelvic tuck—kept arching involuntarily.
Week 4: Could do full 90 seconds unassisted. Pelvic tuck becoming more natural. Starting to understand the difference between stretching hip flexor vs. compressing lower back.
Month 3: The stretch that changed everything. His chronic lower back pain while standing essentially disappeared. He realized tight hip flexors had been the root cause all along—pulling his pelvis forward, compressing his spine, for years.
Real-World Impact
"This is the stretch that fixed my back," Bram wrote. "Not my back stretches—my hip flexor stretch. Once I understood that my hip flexors were pulling my pelvis out of alignment, compressing my lower back, everything clicked."
Specific improvements:
- Standing tolerance: Could stand for hours without lower back fatigue
- Walking gait: Hip could extend fully behind him, creating proper walking mechanics
- Lifting: With neutral pelvis, could hinge at hips properly instead of rounding back
- Sleep: Less lower back pain meant better sleep positions and fewer wake-ups
Integration
The Hip Flexor Stretch is the fourth stretch in the Daily 8 because:
- Directly addresses root cause of most lower back pain
- Follows 90/90 (hips are warmed up)
- Critical enough to be in both morning and evening routines
- Prepares body for standing and working
Recommended: Full 3 minutes (90 seconds each side) in both morning and evening routines. This one is non-negotiable.
Next: Doorway Pec Stretch →
Return to Daily 8 Overview | All Exercises